Antoraの始め方
投稿日:2025年01月19日 最終更新日:2025年02月01日
2. VScodeのフォント変更
Windowsのフォントは汚いので、以下を参考にして、フォントを変更します。
Font Family に 'Source Han Code JP' とクオーテーション付きで指定するとうまくいきました。
3. Install Chrome (WSL)
自作サイトのプレビュー用に、WSLにchromeをインストールします。以下の手順に従って進めてください。
$ sudo apt update && sudo apt -y upgrade && sudo apt -y autoremove
$ cd /path/to/workdir/
$ mkdir chrome && cd chrome
$ wget https://dl.google.com/linux/direct/google-chrome-stable_current_amd64.deb
$ sudo apt -y install ./google-chrome-stable_current_amd64.deb
以下のコマンドを打って、chromeのバージョンが表示されたら成功です。
google-chrome --version3.1. 日本語化
以上のインストール方法のみだと、日本語がインストールできていません。下記のサイトを参考に、WSL環境を日本語化します。
$ sudo apt -y install language-pack-ja
$ sudo update-locale LANG=ja_JP.UTF8
$ sudo apt install fonts-ipafont
$ sudo apt install fonts-ipaexfont
$ fc-cache -fv
参考1: https://windows-core.com/windows_feature/feature-52.php 参考2: https://lef237.hatenablog.com/entry/2022/12/05/163550
参考2のようにフォントをインストールしないと、文字化けは治りません。
このままだと、以下のエラーが出たため、修正します。
manpath: can't set the locale; make sure $LC_* and $LANG are correct wsl
以下のコマンドを実行して、地域設定を変更します。
$ sudo dpkg-reconfigure locales操作方法は、ja_JP.UTF8 的な選択肢を二回程度選択すればOkです。
4. Antora
以下、このページを参考に進めていきます。
4.1. Install Node.js
以下のコマンドを打ってみます。バージョンが表示されたら、Node.jsはインストール済み。そうでなければ未インストールです。
$ node -v私の環境ではバージョンが表示されなかったので、インストールしていきます。
nvmと呼ばれるバージョン管理ソフトがあるようなので、それをインストールします。
$ curl -o- https://raw.githubusercontent.com/nvm-sh/nvm/v0.40.1/install.sh | bash

$ export NVM_DIR="$([ -z "${XDG_CONFIG_HOME-}" ] && printf %s "${HOME}/.nvm" || printf %s "${XDG_CONFIG_HOME}/nvm")"
$ [ -s "$NVM_DIR/nvm.sh" ] && \. "$NVM_DIR/nvm.sh"$ nvm install --lts
$ node -v # Version 確認
v22.11.0
$ nvm alias default 16 # これはエラーになって実行できず。古いバージョン 16 がない。
$ nvm alias default v22.11.0 # 代わりにこのコマンドを打つ。これは、環境変数の設定に必要。このコマンドを打たないと例えば新しいターミナルを立ち上げたときに、npxコマンドやnodeコマンド、npmコマンドなどが使用できなくなる。4.2. Install Antora
$ mkdir docs-site && cd docs-site
$ node -e "fs.writeFileSync('package.json', '{}')"
$ npm i -D -E antora # ここで Warning が出た。npm warn deprecated inflight@1.0.6: This module is not supported, and leaks memory. Do not use it. Check out lru-cache if you want a good and tested way to coalesce async requests by a key value, which is much more comprehensive and powerful.
npm warn deprecated glob@7.1.3: Glob versions prior to v9 are no longer supportedNode.js のバージョンが新しすぎて、 Antora が使用している関数が廃止されているらしい。いったん無視して進める。
4.3. Antora Test
自作サイトを作るためには、Antoraの設定ファイル(playbook)を作成する必要があるらしいです。先ほど作った docs-site ディレクトリに antora-playbook.yml を作成します。
site:
  title: Docs Site
  start_page: component-b::index.adoc # ここにホームページのasciidocを指定します。
content:
  sources:
  - url: https://gitlab.com/antora/demo/demo-component-a.git
    branches: HEAD
  - url: https://gitlab.com/antora/demo/demo-component-b.git
    branches: [v2.0, v1.0]
    start_path: docs
ui:
  bundle:
    url: https://gitlab.com/antora/antora-ui-default/-/jobs/artifacts/HEAD/raw/build/ui-bundle.zip?job=bundle-stable
    snapshot: true
以下のコマンドで、サイトを生成します。
$ npx antora antora-playbook.yml実行結果として、コンソール上にURLが生成されます。
Site generation complete!
Open file:///home/XXXXXXXXX/HOME/docs-site/build/site/index.html in a browser to view your site.
このURLを、chromeに入力すれば、作成したサイトをプレビューできます。chromeは以下のコマンドで起動します。起動できない場合は、 Install Chrome (WSL) を参考に、chrome をインストールしてください。
$ google-chrome
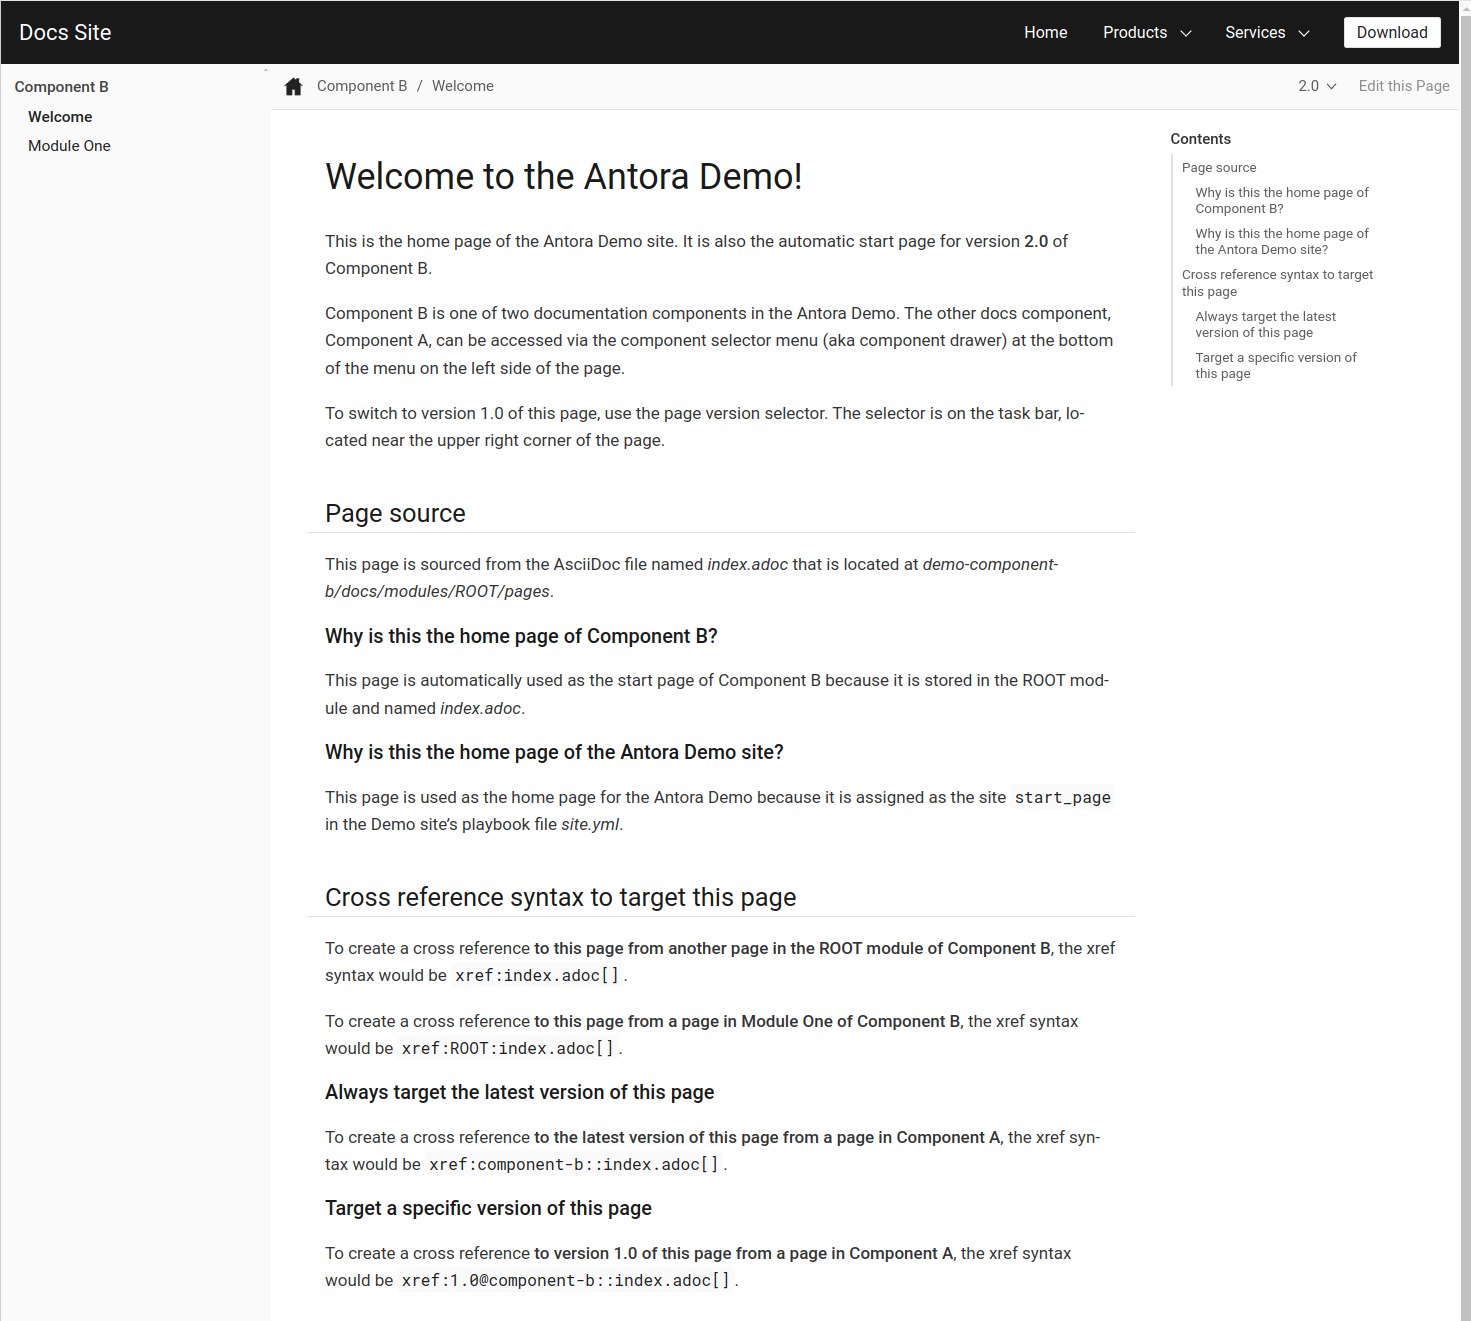
以下のような画面が表示されれば成功です。
次章から、自作のAsciidocファイルをAntoraで変換する方法について述べます。
4.4. How to use Antora
4.4.1. Antora のためのディレクトリ構造の作成
Antora は、asciidocで記載されたコンテンツをhtmlベースのサイトに変換してくれます。この機能を利用するためには、まずAntoraが認識できるようにディレクトリ構造を決められた形式に整える必要があります。
最小構成は、下記のような形です。
📒repository (1)
  📄antora.yml (2)
  📂modules (3)
    📂ROOT (4)
      📂pages (5)
        📄page-source-file.adoc (6)
| 1 | Repository のルートディレクトリ |
| 2 | Antora 用の設定ファイル。Repository のルートディレクトリ直下に置きます。名前は変更できません。 |
| 3 | modules directory. |
| 4 | ROOT module directory. |
| 5 | pages family directory. |
| 6 | Source file of a page. |
今回はこのように作成します。
📒my_homepage
  📂modules
    📂ROOT
      📂images
      📂pages
        📄test-book.adoc
      📄nav.adoc
  📄antora-playbook.yml
  📄antora.yml
各ファイルの中身はこうなっています。
site:
  title: Minato Lab
  start_page: minato-lab::README.adoc
content:
  sources:
  - url: .
    branches: HEAD
ui:
  bundle:
    url: https://gitlab.com/antora/antora-ui-default/-/jobs/artifacts/HEAD/raw/build/ui-bundle.zip?job=bundle-stable
snapshot: truename: minato-lab
version: ~
title: Minato Lab
nav:
- modules/ROOT/nav.adoc= Hellow World.
[.text-right]
投稿日:{postdate}      最終更新日:{revdate}
テストです。* xref:test-book.adoc[]4.5. Github Action の設定
以下のファイルを作成します。
name: Publish to GitHub Pages
on:
  push:
    branches: [main]
  # Allows you to run this workflow manually from the Actions tab
  workflow_dispatch:
concurrency:
  group: github-pages
  cancel-in-progress: false

# Sets permissions of the GITHUB_TOKEN to allow deployment to GitHub Pages


[.text-right]
投稿日:{postdate}      最終更新日:{revdate}

permissions:
  contents: read
  pages: write
  id-token: write
jobs:
  build:
    runs-on: ubuntu-latest
    environment:
      name: github-pages
      url: ${{ steps.deployment.outputs.page_url }}
    steps:
    - name: Checkout repository
      uses: actions/checkout@v4
    - name: Configure Pages
      uses: actions/configure-pages@v5
    - name: Install Node.js
      uses: actions/setup-node@v4
      with:
        node-version: '18'
    - name: Install Antora
      run: npm i antora
    - name: Generate Site
      run: npx antora antora-playbook.yml
    - name: Upload Artifacts
      uses: actions/upload-pages-artifact@v3
      with:
        path: build/site
    - name: Deploy to GitHub Pages
      id: deployment
      uses: actions/deploy-pages@v4
Githubにプッシュすれば、自動でデプロイされます。